


Hey future dev, today we are going to explore Java and build a simple, console-based Chat-Bot. Fasten your seat belt, and let's go!
Prerequisites
❗❗ You need to install JDK (Java development kit) to be able to run Java app on you machine.
To check if it is installed with this command in the CLI (command line interface)
  java -version
  javac -version
❗❗ Make sure to have an IDE (Integrated Development Environment).
I like to use IntelliJ, or you can get Eclipse.
For my readers who prefer to watch videos, you can check this out:
First Steps: Set Up the Project
We’re going to keep things simple — no artificial intelligence, no fancy libraries. Just plain, basic Java. Our goal is to build a simple chatbot that runs in the console and can have a basic conversation with the user.
Before we jump into coding, let’s think about what this chatbot actually needs to do. At its core, it should:
👉
Read what the user types (user input).
👉
Understand it in a simple way (no real “intelligence” here — just checking for certain words or phrases).
👉
Reply with a suitable response (generates output).
That’s it! It might sound basic, but it’s a great way to learn things like input handling, conditionals, loops, and organizing your code — all the essentials of Java programming.
Start Java Project
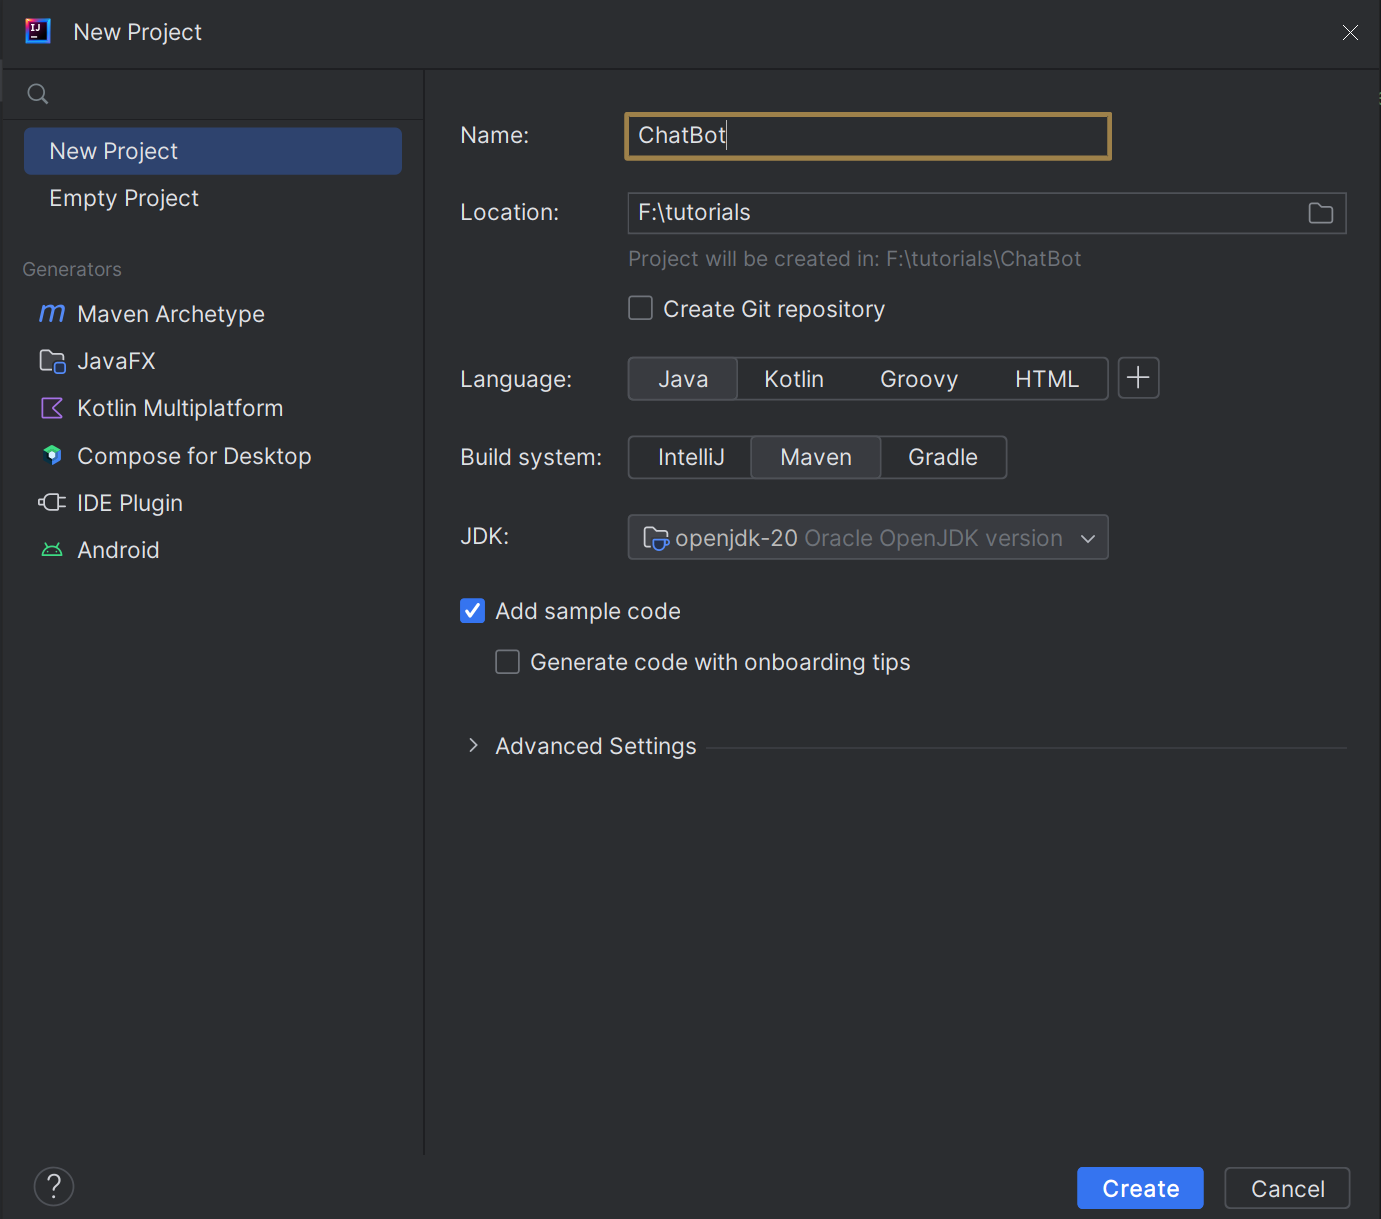
IntelliJ create project modal
I’ve opened my IntelliJ and started by creating a new project. I named the project ChatBot and selected a location on my computer where I want it to be saved.
I chose Java as the programming language and selected Maven as the build system. For the JDK, I used JDK 20, which is already installed on my machine — make sure to select the version you just downloaded.
Once everything was set, I clicked Create, and just like that, my project is ready to go.
Reading User Input
After the project was created, I navigated to the Main.java file and did a bit of cleanup. We can remove everything inside the curly braces of the main method.
This method is the entry point of our application — it’s where Java begins executing the program.
Now, let’s start by printing a simple greeting message for our chatbot.
//Main.java file
package org.example;

public class Main {
    public static void main(String[] args) {
        System.out.println("Hello! My name is
        Cedric and I am a chat-bot.
        What is your name?");
    }
}
System.out.println("Some text...") this statement tells the computer to print whatever is inside the parentheses. Make sure to use double quotes ("") when passing text (also known as a string).
After we run the application (you can press Shift + F10 in IntelliJ), you should see the following output in the terminal:

ChatBot output
Generate Output
The next step is to get some basic input from the user, and a Scanner instance can help us do that.
Scanner it's a built-in Java class that belongs to thejava.utilpackage. It allows us to read input from the terminal or console, which makes it perfect for interactive programs like our chatbot.
// make sure
// to add this line in the beggining of your file,
// or Java will not be able to run your app
import java.util.Scanner;

public class Main {
    public static void main(String[] args) {
        //...Previous code in main method

        //Read User Input
        Scanner inputReader = new Scanner(System.in);
        String userName = inputReader.nextLine(); //variable
        //Chat Bot output
        System.out.println("Hey " + userName + ",
        it's nice to meet you!");
    }
}
We’ve created a new Scanner and stored it in a variable called inputReader. This lets us read input from the user, and since it’s stored in a variable, we can use it as many times as we need throughout the program.
Then, we made a new variable called userName, and gave it the type String If you're wondering what that means — the word before the variable name tells the computer what type of data we’re working with. In this case, it’s text/String.
It's worth noting that when someone types something into the console, it’s always treated as a String, even if they enter a number like 1 or 9999. It’s still just string to Java.
We used inputReader.nextLine() to grab whatever the user typed and store it in our userName variable.
Finally, we added a line to print a greeting that includes the user’s name — a simple way to make the chatbot feel more personal.
Adding Loops
So far, our chatbot is very limited — it only takes one input from the user and then ends the program. We want to improve this by making sure the bot keeps talking until the user does not leave the program.
To achieve this, we can use a flow control structure called a while loop. This is one of the basic control structures in programming that repeats a certain action (or block of code) as long as a specific condition is true.
Here’s a simple example:
    while(candies left > 0) {
        Give candy to a kid
    }
In this case, the loop will keep giving out candies until there no candies left. Once the condition `candiesLeft > 0` becomes false, the loop stops.
For our chatbot, we want the conversation to continue until the user types something like "bye" or "goodbye".
Here’s what we going to put to our main method:
while (!userInput.contains("bye")) { // The '!' means "NOT"

    System.out.println("How can I help you?");
    // update userInput with new input
    userInput = inputReader.nextLine();
}
This code says, while user input does not contain bye, we want to keep asking how can we help.
It's important to update the condition inside the loop,
otherwise you'll end up in an infinite loop.
Interactivity
Our final step is to make the bot a bit more expressive — right now, it only says Hello and How can I help you?, which isn’t very exciting.
To make the conversation more engaging, we’ll add some basic pattern matching. Based on certain keywords the user types, our bot will respond with a more specific and appropriate message.
For example, we’ll add simple mood detection. If the user types words like "sad", "bad", or "angry", the bot will recognize that and reply with one of several supportive responses. On the other hand, if the user types something like "happy", "good", "amazing", or "awesome", the bot will respond with something cheerful in return.
We'll use simple condition checks (if statements) and choose a random response from a list of prewritten replies — making the bot feel a bit more personal and fun to talk to.
Let's create a new method that will have list of happy and unhappy keywords, that will be used to detect what kind of response do we want to send to our user.
public static String getResponse(String userInput) {

    //Array of strings for detecting sad mood
    String[] unhappyKeywords = {
            "sad",
            "bad",
            "angry",
            "upset",
            "tired",
            "depressed",
            //You can add you own as well
    };
    String[] happyKeyWords = {
            "happy",
            "good",
            "great",
            "awesome",
            "amazing",
            "excited"
    };
    String output = "";

    //this is a for loop to iterate through all
    // our sad keywords
    for(String word : unhappyKeywords){
        if(userInput.contains(word)){
            output =  "I'm sorry you feel
            " + word + ". " + generateSadResponsnes();
            return output;
        }
    }
    //this is a for loop to iterate through
    // all our happy keywords
    for(String word : happyKeyWords){
        if(userInput.contains(word)){
            output =  generateHappyResponsnes();
            return output;
        }
    }

    //if user inout did not have any words from
    // these 2 arrays our bot will send this one
    return "I don't think I understand what do you mean";

    }
output = generateHappyResponsnes();
This output variable holds the value from generateHappyResponsnes() method that is responsible of generating responses that our user will see.
And here is the actual implementation of the logic we need:
//Method for sad responses
 public static String generateSadResponsnes(){

    String[] sadResponses = {
        "I'm here if you want to talk.",
        "That sounds tough. Remember, you're not alone.",
        "Things will get better, I promise.",
        "It's okay to feel down sometimes. I'm listening.",
        "Take your time, and know that I care.",
        "I'm here to support you anytime.",
        "You're stronger than you think.",
        "If you want to share more, I'm here.",
        "Hang in there! Better days are ahead.",
        "Don't hesitate to tell me what's bothering you."
    };
        //Select a random sentence from our array and send it
    Random random = new Random();
    int index = random.nextInt(sadResponses.length);
    return sadResponses[index];
};
//Method for happy responses
public static String generateHappyResponsnes(){
    String[] happyResponses = {
        "That's wonderful to hear! Keep shining!",
        "I'm so glad you're feeling good!",
        "Awesome! Your positivity is contagious!",
        "Yay! That makes me happy too!",
        "Great vibes! Let's keep the good energy going!",
        "Fantastic! You're doing amazing!",
        "Love hearing that! Keep up the great mood!",
        "Sounds like a perfect day!",
        "Keep smiling, it looks great on you!",
        "Happiness suits you well!"
    };
    Random random = new Random();
    int index = random.nextInt(happyResponses.length);
    return happyResponses[index];
};
So, here we created 3 new methods.
Let's talk about the flow of our program. Our while loop reads user input continuously until the user types something containing the word "bye". Each input is then processed by the getResponse(userInput) method.
Inside this method, we have two string arrays (think of them as lists) that contain mood-related keywords. We use a for loop to iterate through each array and check if the user's input contains any of the words from these lists.
If the input contains any word from the first list (the sad mood keywords), the program calls generateSadResponses() to select a random sentence to respond with.
Similarly, if the input contains any word from the happy mood list, it calls the corresponding method to generate a happy response.
This way, our chatbot tailors its replies based on the mood detected in the user's message.
Tricky Question. Try to answer what happens if the user input contains words from both lists?
Wrap Up
Thanks so much for following along with this tutorial!
You can keep improving your chatbot by adding fun features — like a built-in calculator, or keyword detection for things like pets, family, hobbies, and more.
Don't hesitate to subscribe to my YouTube channel and Telegram to not miss any new content!
Happy Coding! 🚀


Comments